| The Members |The Tracks| Links | Contact | PCRA | ARR Forum | Commuterlite |


Ken Lindsay Racing offer the following Services:
- Big Bore Kits
- Reboring
- Camshafts
- Carburetors
- CDI Ignition
- Centrifugal Oil Filters
- Mufflers/Exhaust Pipes
- Alloy Rear Sprockets
- Rebuilds
- Machining
- Fabrication

![]()


Racing Results
Superlite AM and Pro Championship Results
- 1988 Started Bucket Racing
- 1989 Superlite AM 1st
- 1990 - - -
- 1991 Superlite Pro 6th
- 1992 Superlite Pro 6th
- 1993 Superlite Pro 3rd
- 1994 Superlite Pro 6th
- 1995 Superlite Pro 7th
- 1996 Superlite Pro 6st
- 1997 Superlite Pro 3rd
- 1998 Superlite Pro 2nd
- 1999 Superlite Pro 1st
- 2002 Superlite Pro 3rd
- 2004 Superlite Pro 2nd
- 2005 Superlite Pro 2nd
- 2006 Superlite Pro 1st
- 2007 Superlite Pro 3rd
- 2008 Superlite Pro 1st
- 2009 Superlite Pro 3rd
- 2010 Superlite Pro 4th
One Hour, Interstate Challenge and Bucket Nationals Results
Superlite Pro Class
- 1991 Interstate Challenge Lakeside 10th.
- 1992 Interstate Challenge Lakeside 3rd.
- 1994 Bucket Nationals
Mt Gambier 3rd.
- Interstate Challenge
Lakeside 3rd.
Member of winning team in team race - 1995 Interstate Challenge Lakeside 6th.
- 1996 Bucket Nationals 9th.
- 1997 AMCN Interstate Challenge Eastern Creek 5th.
Member of winning team in team race.
AMCN Bucket Nationals
Eastern Creek 6th. - 1998 TJ's Race Paint One Hour Oran Park South 2nd.
(Simon Thomas/K. Lindsay)
- Interstate Challenge
Oran Park GP 5th.
Member of 2nd placed team in Team Race. - 1999 TJ's Race Paint One Hour Oran Park South 4th.
(Ken Lindsay/Steve Nicholl).
- Hartwell Club Championship
Phillip Island 1st. (4Stroke) - 2001 Interstate Challenge Eastern Creek 6th.
Member of winning team in team race.
- AMCN Bucket Nationals
Broadford 11th. - 2002
AMCN Bucket Nationals
Broadford 4th.
- Hartwell Club Championship
Phillip Island 2nd. - 2004 Suzuki Newcastle Bucket Nationals 6th.
- 2006 One Hour Race 7th.
- 2008 One Hour Race 2nd.
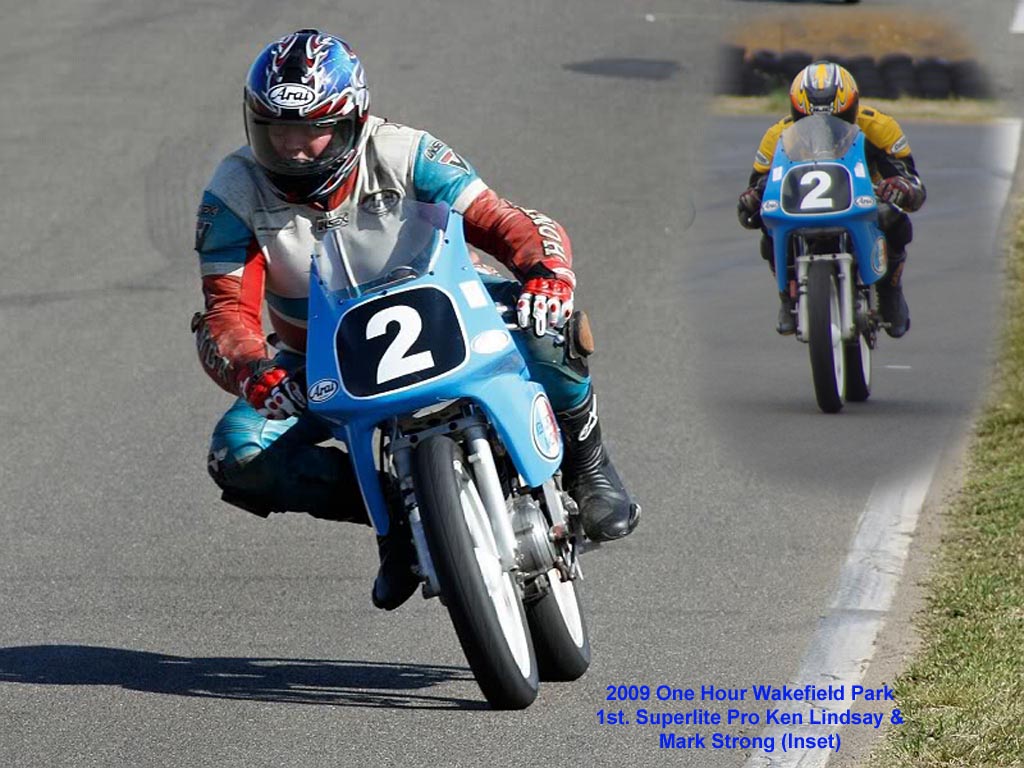
(K. Lindsay/D. Hall) - 2009 One Hour Race 1st.
(Ken Lindsay/Mark Strong)

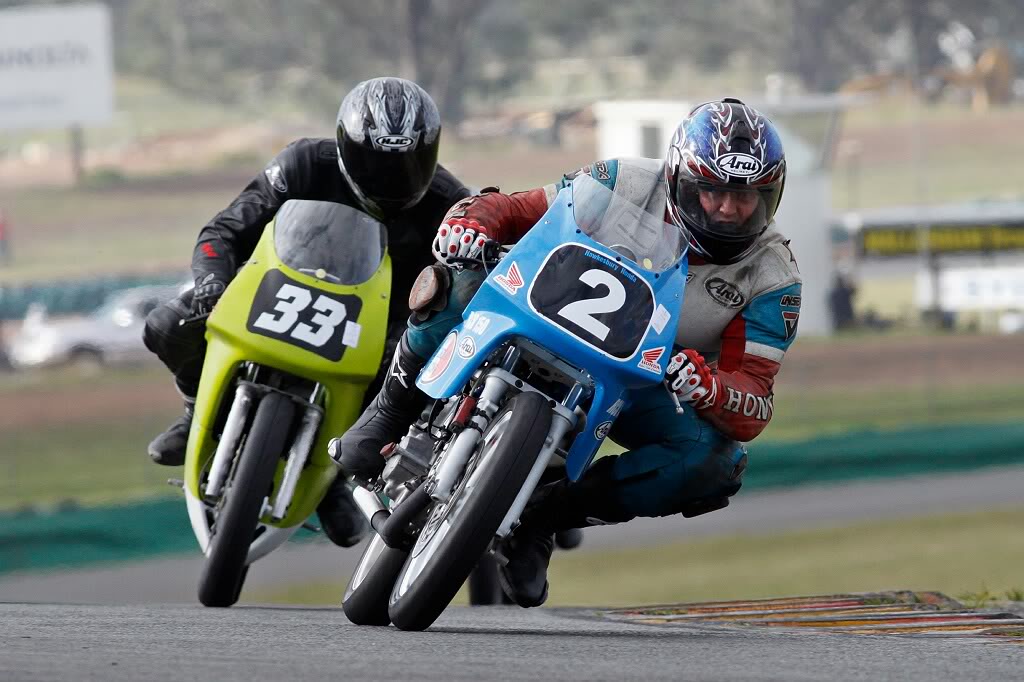
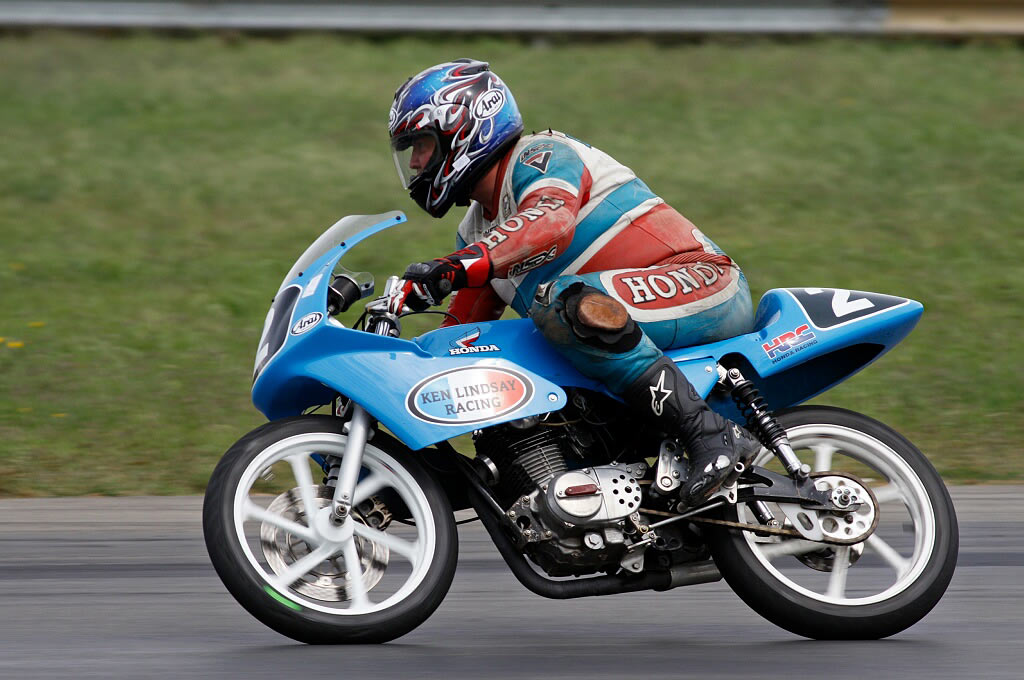
Building a Works Bucket Racer
By Ken Lindsay
This is the story of building my bucket racer 2.
Work started with a standard CB125N frame. It was 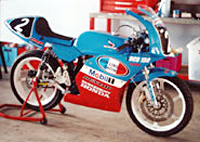 attacked
with a hacksaw, angle grinder and oxy, stripped of all
unnecessary brackets etc. and looked pretty sad sitting
on the bench. Lugs were welded to the frame
approximately 100mm above the swingarm pivot, which
served two purposes, foot peg hanger mounts as well as
the very important bracing of the swingarm pivot. A new
rear fuel tank mount was welded to the frame, 25mm
rearward of the old mount. 5mm thick shock mount plates
were welded to the frame (as the standard rear shock
mounts were previously cut off) for a “bolt on” type
shock mount system. A jig that I had made some years ago
was used to construct a 25mm mild steel box section
swingarm, complete with provisions to use snail cam
chain adjustment. Bronze bushes with stainless inserts
were made and fitted.
attacked
with a hacksaw, angle grinder and oxy, stripped of all
unnecessary brackets etc. and looked pretty sad sitting
on the bench. Lugs were welded to the frame
approximately 100mm above the swingarm pivot, which
served two purposes, foot peg hanger mounts as well as
the very important bracing of the swingarm pivot. A new
rear fuel tank mount was welded to the frame, 25mm
rearward of the old mount. 5mm thick shock mount plates
were welded to the frame (as the standard rear shock
mounts were previously cut off) for a “bolt on” type
shock mount system. A jig that I had made some years ago
was used to construct a 25mm mild steel box section
swingarm, complete with provisions to use snail cam
chain adjustment. Bronze bushes with stainless inserts
were made and fitted.
At this point I made up a jig to aid construction, which
was basically two lengths of aluminium channel used to
clamp the wheels square and in line.
The rolling chassis was then assembled, ie: frame,
swingarm, triple clamps, forks wheels and a dummy engine
(crankcases with a gearbox output shaft). It was then a
matter of making alloy wheel spacers and getting the
wheel alignment correct as well as chain alignment.
Needless to say this was quite time consuming, however
as you would expect it would prove to be time well
spent. At this stage the rear of the frame had been
supported by a stand, as no top shock mounts existed
hence no shocks fitted to the bike.
The next step was to set up the geometry to the
specifications I required with adjustment either way. I
wanted something that steered similar to my old bike but
with added stability. This meant a careful selection of
triple clamps (offset) and rear ride height. The triple
clamps I selected were a top clamp from a Honda XL185S
and the bottom clamp from a 1974 CR125M. There were
various reasons for this selection. (A) The offset was
to my requirements, (B) The bottom CR125M clamp was
obviously the same dimensions as a bottom XL185 item but
made from aluminium as opposed to steel (lightness) and
(C) I had them lying around (cheap).
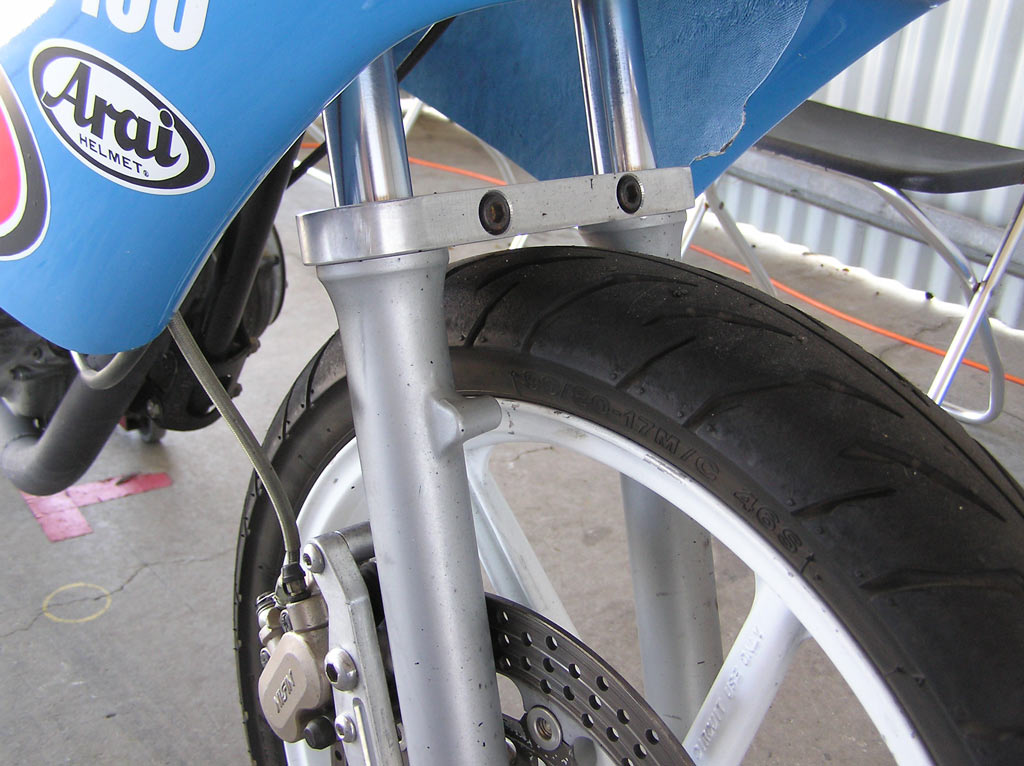
The triple clamps were made for 31mm forks and the forks
I selected to use were 27mm CB125N items, simply because
I like their performance (with minor internal & external
modifications) at the time, they are very light and the
cost (I had them lying around). I had to machine up a
set of four aluminium sleeves so the clamps would accept
the forks. The forks were then fitted and set in the
“middle” of their adjustment range in the clamps and
using an “angle meter” the steering head angle was set
to the required angle by jacking up the back of the
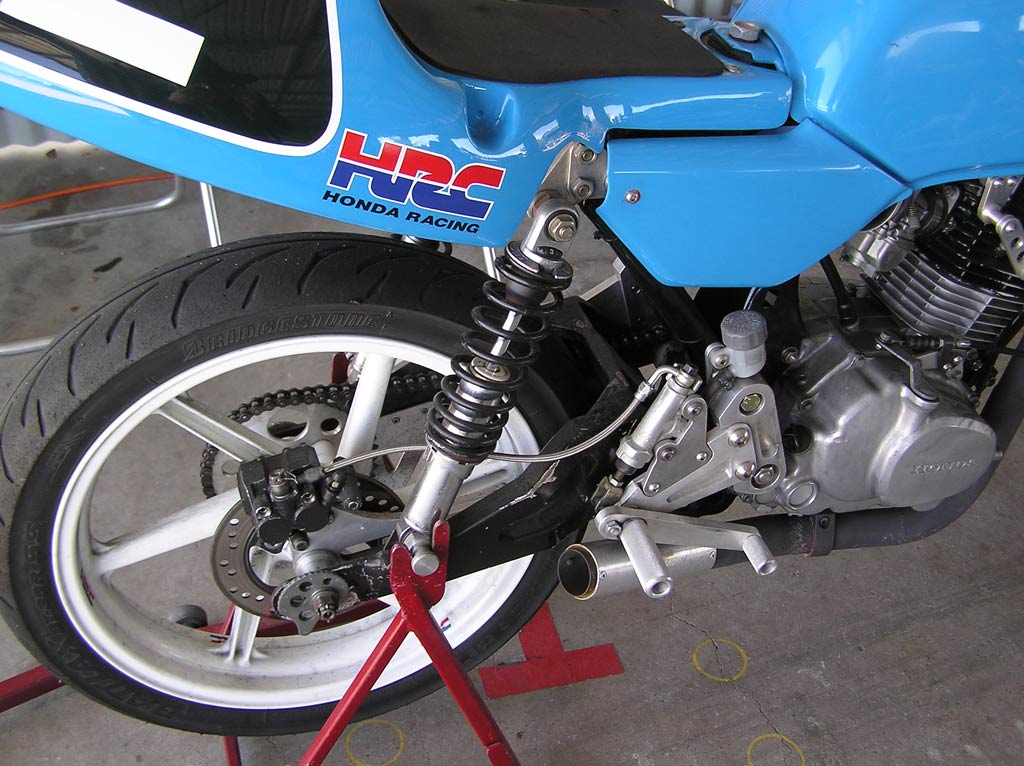
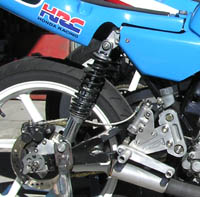
frame. Once this was set up the rear shocks were bolted
onto the swingarm using specially machined alloy bolts.
Measurements were made for the “bolt on top shock
mounts”. While in the process, five sets of these “bolt
on shock mounts” were machined up from billet aluminium
all varying in measurements by 10mm. These would be used
to vary the ride height of the bike by simply unbolting
the shock mount and bolting on another set. Adjustment
range is 40mm and can be changed in about 5 minutes. At
this stage, the bike was stripped down and the frame and
swingarm sent off to be powder coated black.
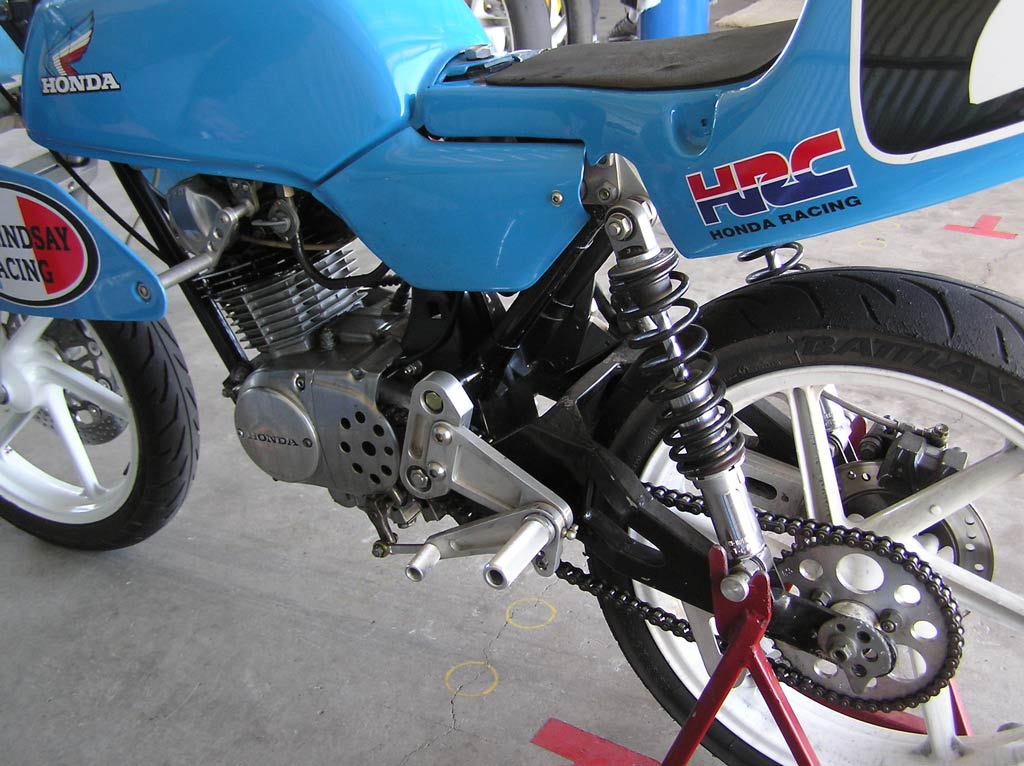
While the frame was off getting powder coated there were
various items I had to make for the machine which
included a one piece fork brace, foot pegs & foot peg
hangers, rear brake pedal, gear lever, front brake
caliper bracket, rear brake caliper bracket, rear master
cylinder bracket, all of which were machined and/or
fabricated from billet aluminium. Fairing mounts, seat
mounts, gear linkage and bolt on fuel tank mounts were
also made. I polished all these items as well as the
front forks and triple clamps.
After receiving the frame back from being powder coated,
the rolling chassis was assembled. This included fitting
the swingarm, triple clamps, forks, shocks, wheels,
handlebars, brake master cylinders & calipers, fork
brace, foot pegs, rear brake pedal, gear pedal, fairing
mounts, seat mounts and fuel tank mounts.
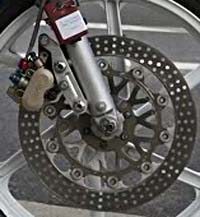
As mentioned previously, Brake caliper mounts etc. were
being made to suit the calipers I selected to use. I
ended up with a VFR750 caliper mated to a CBX250 (12mm)
master cylinder on the front and a CR125 caliper &
master cylinder on the rear.
 Once
the rolling chassis was completed, it was then required
to modify the seat to fit as required. This meant a
couple of visits from my friendly spray painter &
repairer, who cut, shaped and fibreglassed the unit for
me. The seat started life as a 1997 Marco Melandri GP
Replica and really only needed a bit of reshaping to
fit. Once the seat was finished, I then needed to fit
some sort of side covers and I ended up using slightly
modified CB125T covers. They fitted neatly, weighed
nothing and cost nothing, but they finished off the
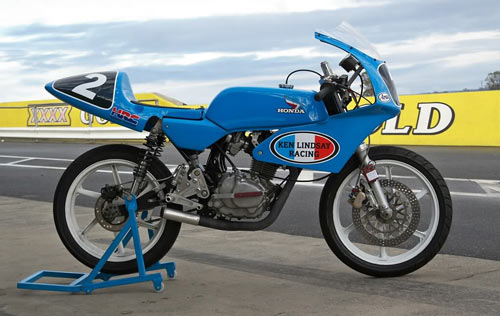
whole package beautifully. A Moriwaki GP80 fairing was
selected to use and fitted nice and neatly to the bike.
Finally I fitted a VT250 front mudguard to the bike and
it was perfect and again this fitted beautifully. Once I
was happy with the way all the body work looked & fitted
the bike, the fuel tank, fairing, seat, side covers &
front mudguard were all sent off to the painters. What
would come back was a brilliant job obviously painted in
the now well known “Ken Lindsay Racing” colours of Blue,
White & Red.
Once
the rolling chassis was completed, it was then required
to modify the seat to fit as required. This meant a
couple of visits from my friendly spray painter &
repairer, who cut, shaped and fibreglassed the unit for
me. The seat started life as a 1997 Marco Melandri GP
Replica and really only needed a bit of reshaping to
fit. Once the seat was finished, I then needed to fit
some sort of side covers and I ended up using slightly
modified CB125T covers. They fitted neatly, weighed
nothing and cost nothing, but they finished off the
whole package beautifully. A Moriwaki GP80 fairing was
selected to use and fitted nice and neatly to the bike.
Finally I fitted a VT250 front mudguard to the bike and
it was perfect and again this fitted beautifully. Once I
was happy with the way all the body work looked & fitted
the bike, the fuel tank, fairing, seat, side covers &
front mudguard were all sent off to the painters. What
would come back was a brilliant job obviously painted in
the now well known “Ken Lindsay Racing” colours of Blue,
White & Red.
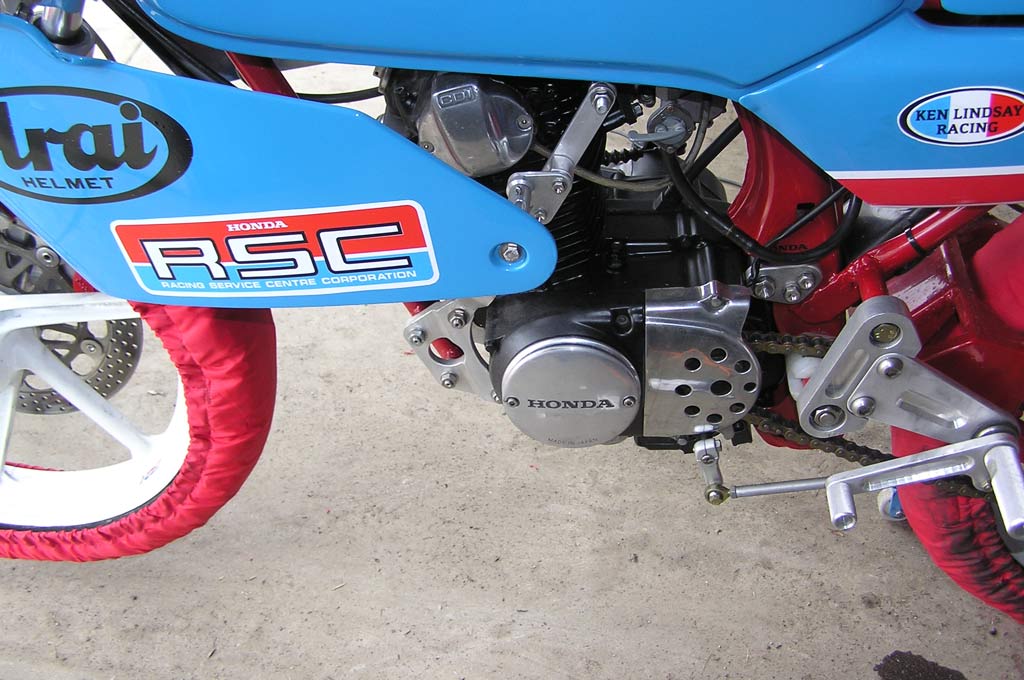
In the mean time the engine was built based on XL185
Crankcases Cylinder & Head, CB125 Crankshaft, CB100
Gearbox & XL185 Clutch. The engine, exhaust & carburetor
were fitted in the chassis along with all the electrics.
The body work was then fitted to the bike and the
machine was ready for the track. As with any new bike,
some changes have been made and there have been a few
small problems ironed out.
Since the bike was built, the triple clamps have been
changed from the CR125M / XL185 combination to a set of
machined billet aluminium ones using a 5mm different
offset & the forks have been replaced with a 32mm
Item off a Suzuki GT250X7. The swingarm has been
changed for a longer unit by 20mm. The engine crankcases
have been changed to XR200 with 6 speed gearbox. The
front & rear brake calipers have been replaced with twin
opposed piston Brembo’s & the bottom half of the fairing
removed to comply with 2004/2005 rule changes.
The Bike is very competitive & an absolute joy to ride.
Refinement of the engine & chassis is always ongoing.
Goto King Kenny profile